

In today’s digital era, providing seamless access to information and support is crucial for organizations striving to enhance user experience. One effective way to achieve this is by integrating web widgets into platforms, such as SharePoint sites. These widgets not only empower users to find relevant content quickly but also enable direct communication with support agents.
In this blog post, we’ll explore what a web widget is, why it is important to add it to a SharePoint site, the process of adding a web widget to a SharePoint site, and let’s also unlock the benefits of adding it.
What are web widgets?
Web widgets are small applications or components embedded into web pages to perform specific functions, such as search, chat, or feedback collection. In the context of SharePoint, a web widget can streamline user interactions by providing instant access to knowledge bases, support channels, or other relevant resources.
Benefits of adding web widget to a SharePoint site
1. Improved user experience
By incorporating a web widget, you empower users to access information and assistance without navigating away from the SharePoint environment, enhancing overall user experience.
2. Streamlined communication
Web widgets often include features like live chat, allowing end users to communicate directly with support agents or find answers to their queries in real time.
3. Enhanced productivity
Quick access to knowledge bases or self-service options within the web widget can help users resolve issues independently, reducing dependency on support agents.
Recommended Reading: 8 Best Customer Self-Service Portals
4. Data insights
Many web widgets offer analytical capabilities, providing valuable insights into user behavior, popular queries, and areas for improvement within the SharePoint site.
Steps to adding web widget to a SharePoint Site
Step 1: Choose the right web widget
Before integration, select a web widget that aligns with your organization’s requirements and objectives. Consider factors such as functionality, customization options, and compatibility with SharePoint.
Step 2: Obtain necessary permissions
Ensure that you have administrative access to both your SharePoint site and the selected web widget platform. This will allow you to implement the integration smoothly and configure the widget settings as needed.
Step 3: Configure the web widget
Follow the instructions provided by the web widget provider to configure the widget according to your preferences. This may include customizing the widget’s appearance, defining user permissions, and setting up automation features.
Step 4: Embed the widget in SharePoint
Once the web widget is configured, embed it into your SharePoint site using the appropriate integration method. This typically involves copying and pasting a snippet of code provided by the widget provider into your SharePoint page’s HTML editor.
Step 5: Test and optimize
After embedding the web widget, thoroughly test its functionality to ensure seamless integration with your SharePoint site. Solicit feedback from users and monitor performance metrics to identify areas for optimization.
Recommended Reading: How to Create a SharePoint Ticketing System?
Adding the Desk365 web widget to your SharePoint site
Discover how to add the Desk365 web widget to your Microsoft SharePoint site using SharePoint Framework (SPFx) extensions. This feature makes it easier for users to contact support agents directly from the SharePoint site. To do this, you’ll need to be the admin of the SharePoint site and have access to the Settings Tab in Desk365’s Agent Portal.
To add the Desk365 web widget to your SharePoint site, follow these steps:
Step 1: Choose an extension
- First, decide whether to use an existing extension or create your own.
- If you decide to use an existing extension, select a SPFx extension from this Microsoft community-maintained GitHub repository. In this guide, we’ll use the React Script Editor extension.
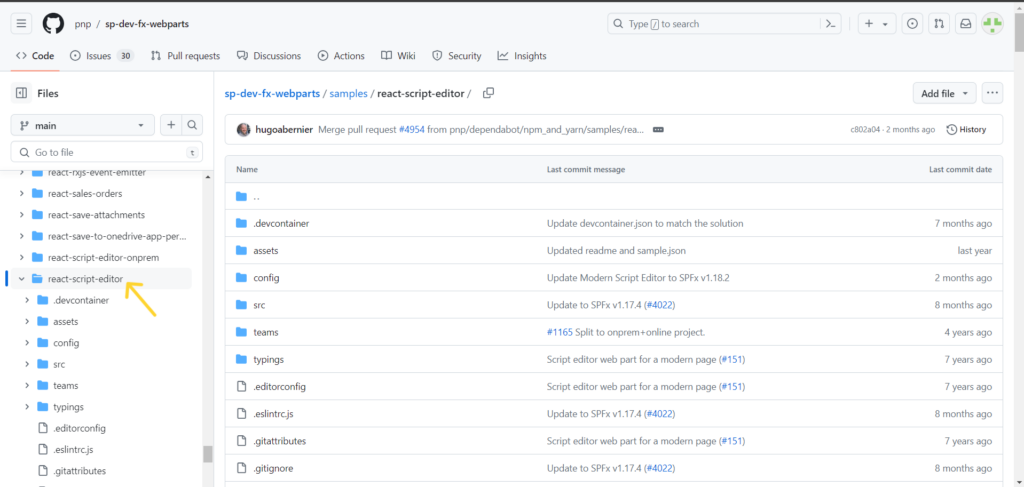
- Follow the instructions on the extension’s GitHub page.
- Once completed, you’ll receive a file with the .sppkg extension.
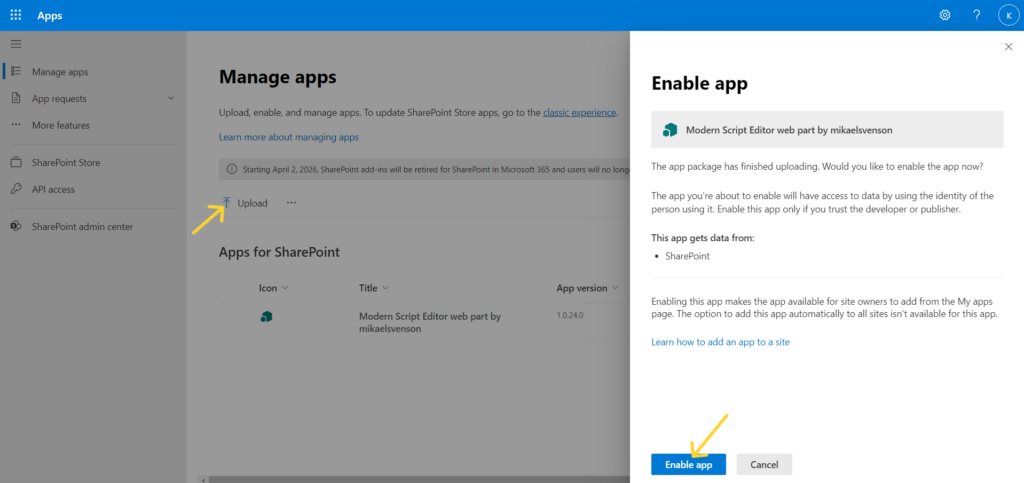
Step 2: Upload the extension to the SharePoint admin center
- Access your SharePoint admin center.
- Go to the Manage apps page.
- Upload the .sppkg extension and enable the app.Your extension will now be uploaded.
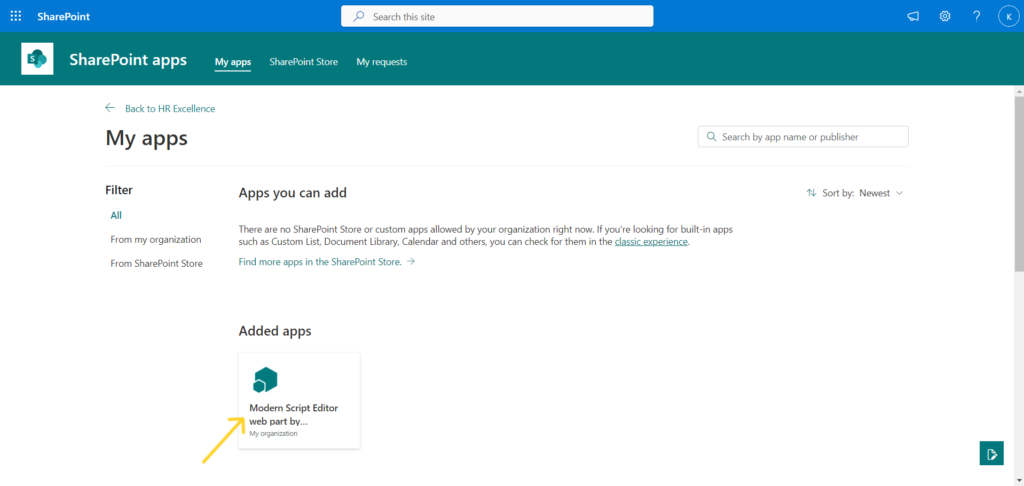
Step 3: Add the app in the SharePoint site
- Navigate to your SharePoint site and go to the settings option.
- Click on “Add an app”.

- On the “My Apps” page, locate the app you added. Select the app and then click on Add.
Step 4: Embed the Desk365 web widget
With the app being added to the SharePoint site, you can now embed the Desk365 web widget on your page:
- Open the SharePoint site to embed the web widget and click Edit.
- Add a new web part and select the extension you added
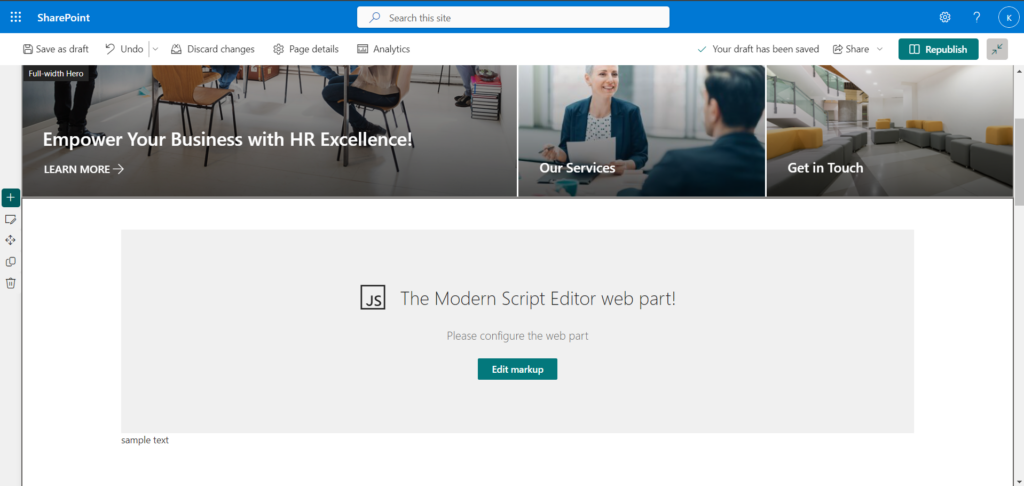
- Click Edit markup, and in the Edit HTML Code section embed the web widget code from Desk365’s agent portal and click Save.


Once completed, republish the site. The Desk365 web widget will now be available on your SharePoint page.

Recommended Reading: Creating a Ticket via Web Forms/Web Widgets
By adding a web widget to your SharePoint site, you can improve the user experience, streamline communication, and gain valuable insights into user interactions. Whether it’s facilitating self-service support or enabling real-time chat assistance, web widgets empower organizations to deliver unparalleled value to their users within the familiar SharePoint environment.